Trip planning
- How to open the Active Trips view?
- How to open the Unplanned Cargo Map?
- How to open Trip Tracking / Map / Chat?
- How to create a new trip?
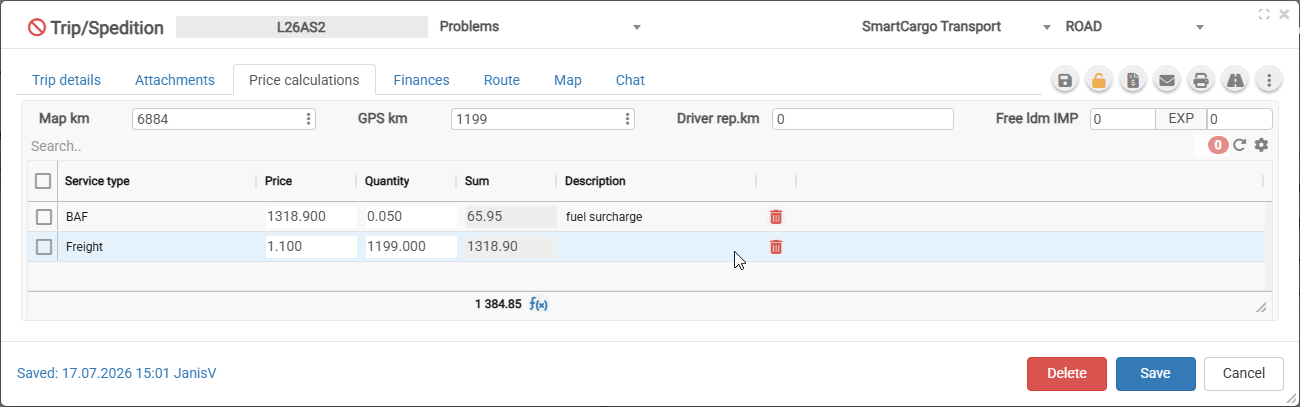
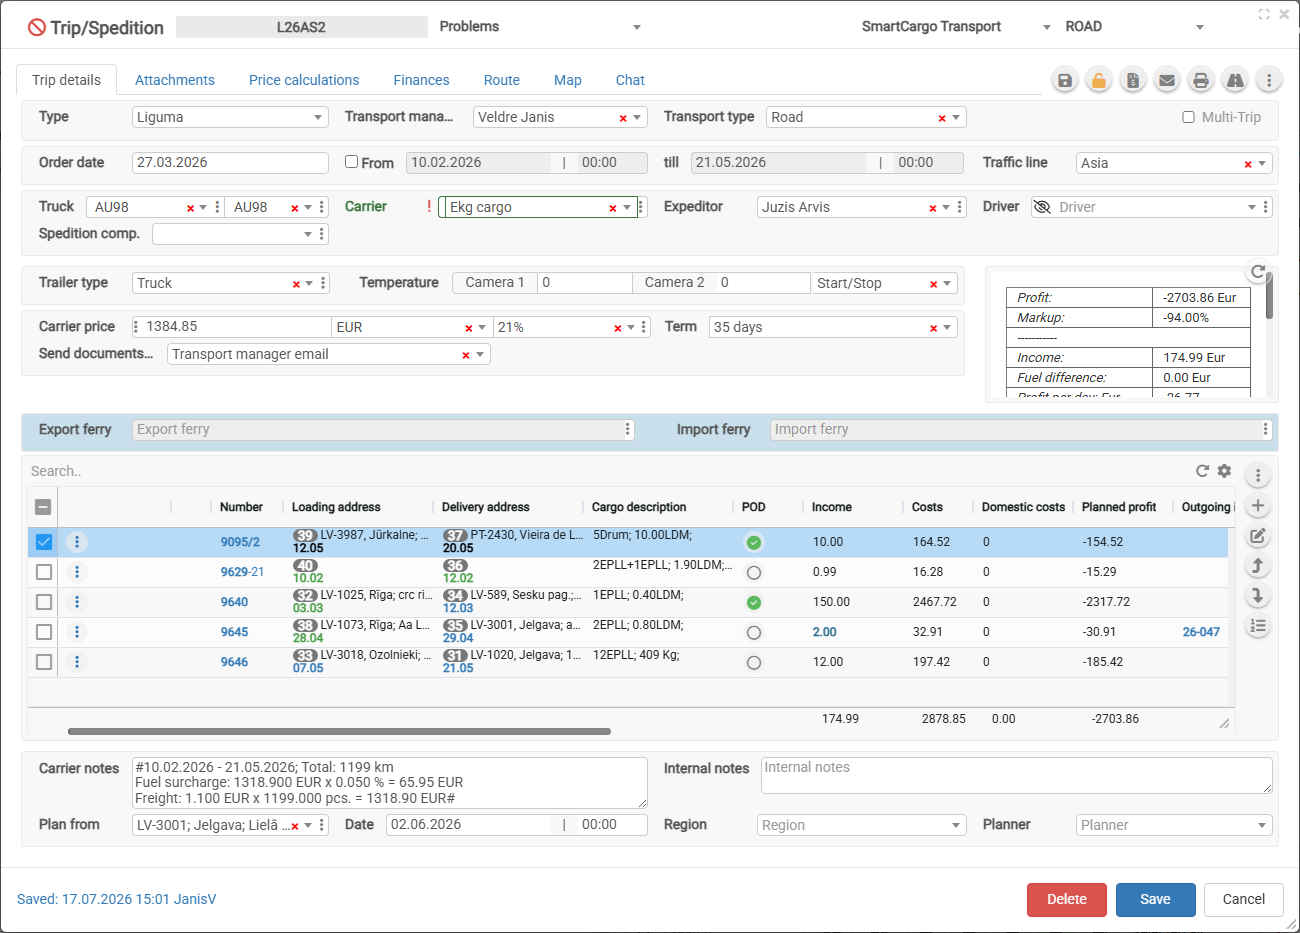
- How to cauculate trip price
- How to change the loading and delivery sequence in a trip?
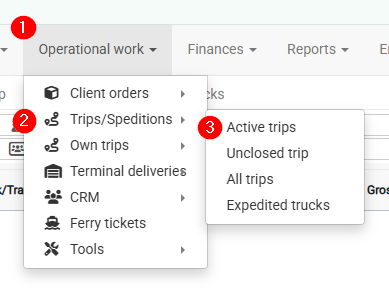
How to open the Active Trips view?
-
Operational work
- Trips / Speditions
- Active trips
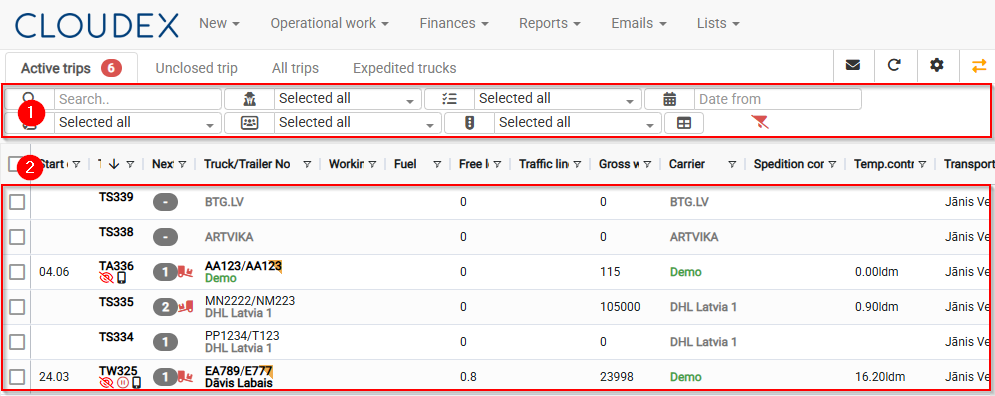
How to use the Active Trips view?
- Filters
- List of currently available trips
By default, trips/shipments will remain in the Active Trips list until their status  is changed to "Delivered."
How to open the Unplanned Cargo Map?
- Click “New” in the top navigation bar
- From the pop-up menu, select “Trips/Expeditions”
Required workflow: Operational work → Trips/Expeditions.
You will open the Trips/Expeditions window.
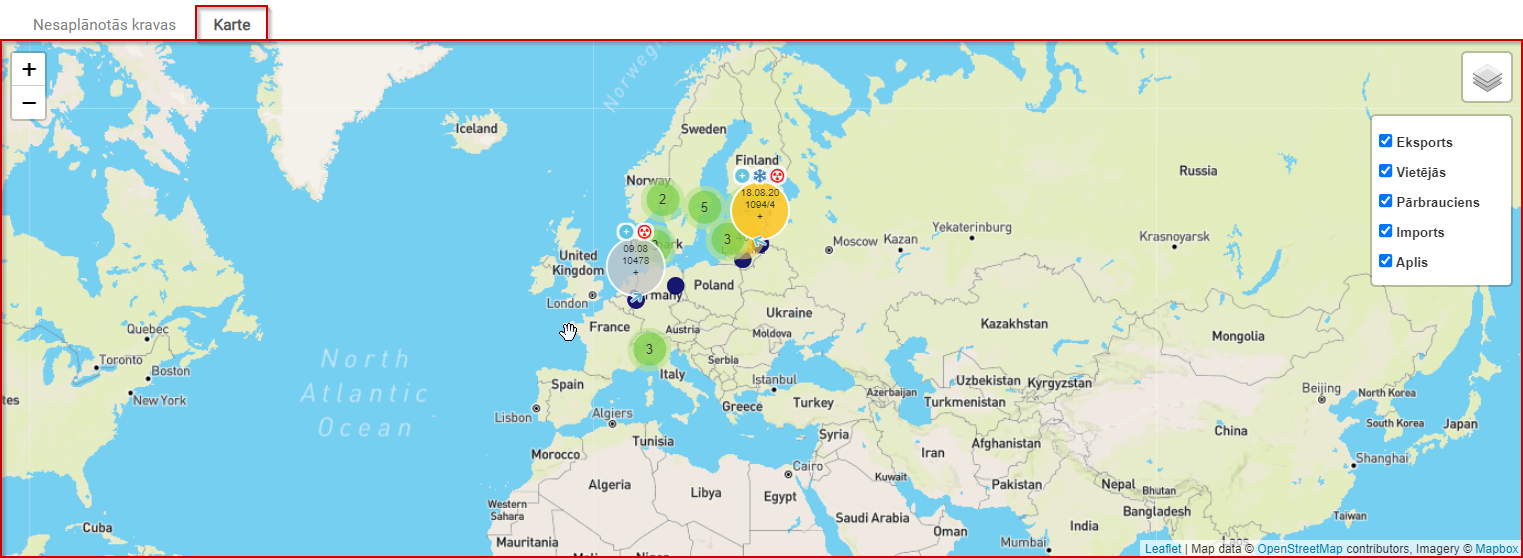
Current Unplanned Cargo Map
The current unplanned cargo map displays cargo in a visually clear way, making it easier to search for shipments.
For cargo to be properly displayed on the map, loading and unloading coordinates are important. See the image below.

Cargo can be filtered by the following attributes: Export, Local, Transit, Import, Round trip.
How to open Trip Tracking / Map / Chat?
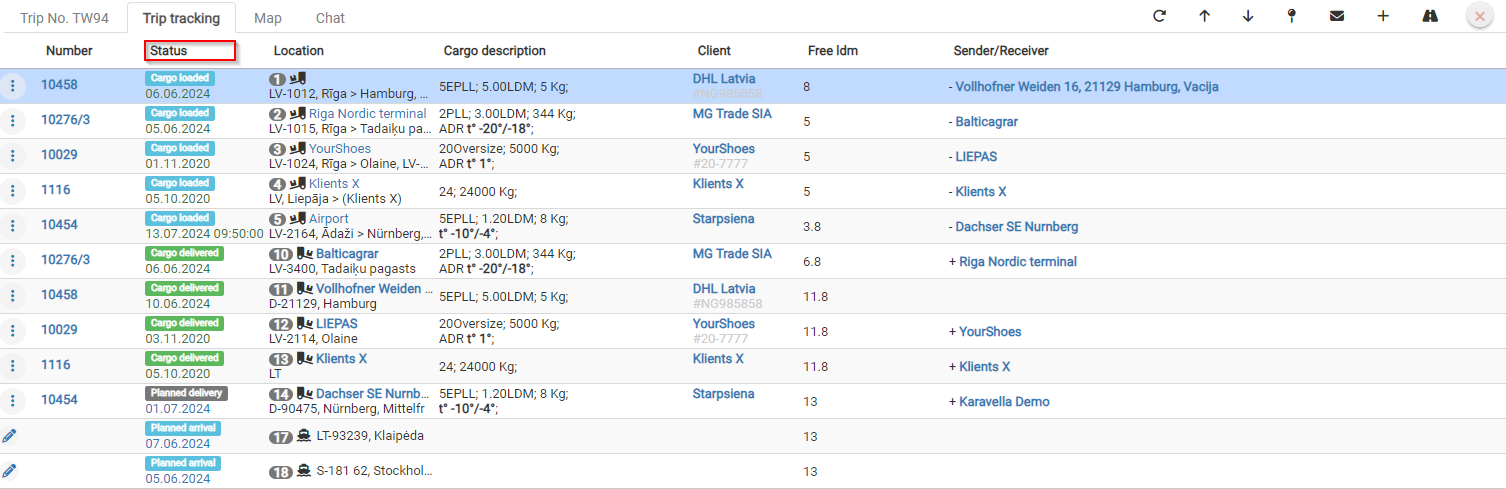
- Open Trip Tracking / Map / Chat.
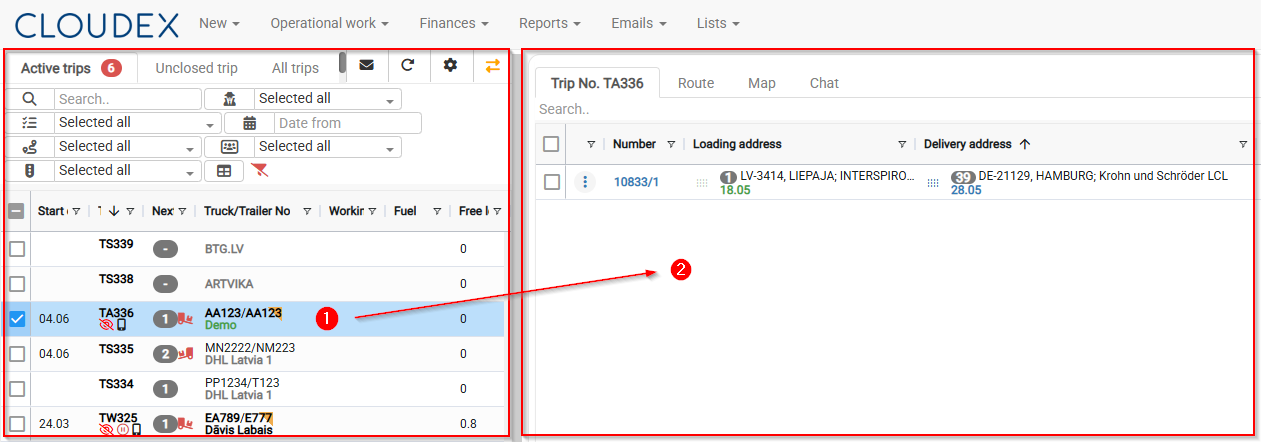
- Trip Tracking / Map / Chat

- Trip Tracking
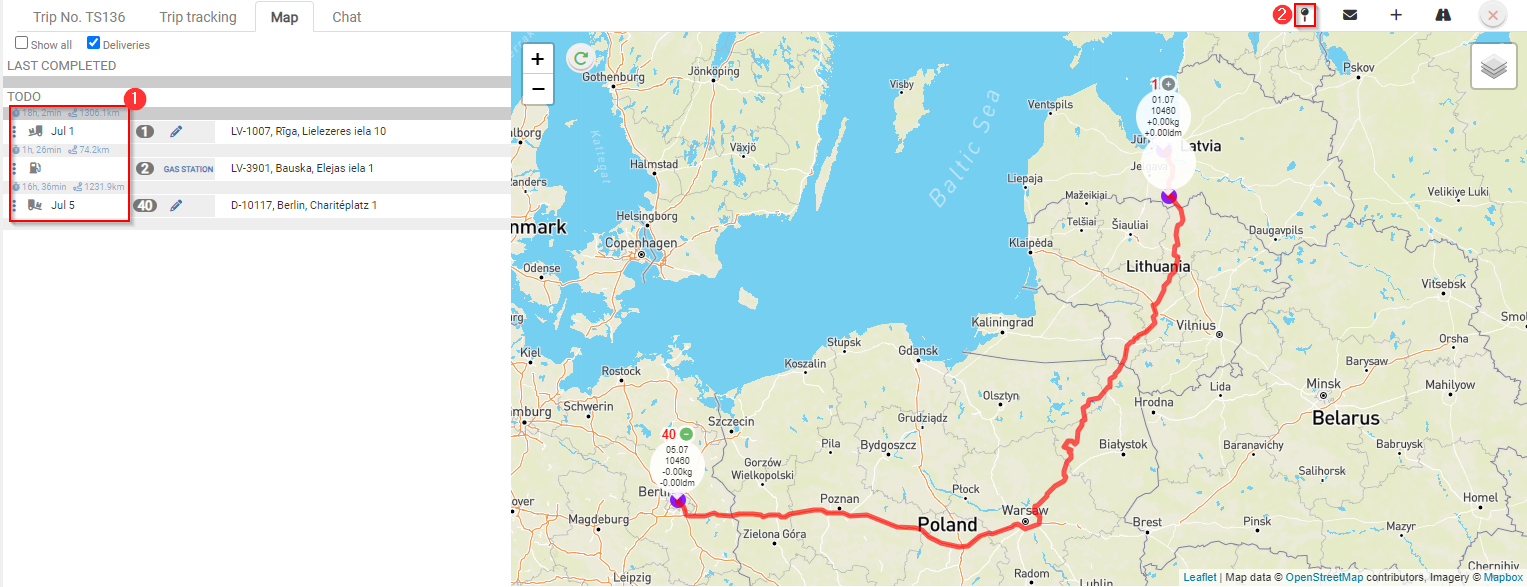
- Map
- Distance in kilometers between stops.
- Add additional stops by clicking the + symbol.


How to create a new trip?
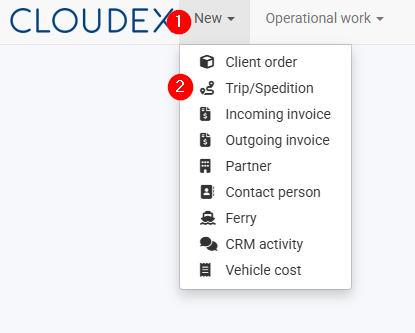
- Click the “New” button in the toolbar.
- From the menu that opens, select “Trip/Expedition”.
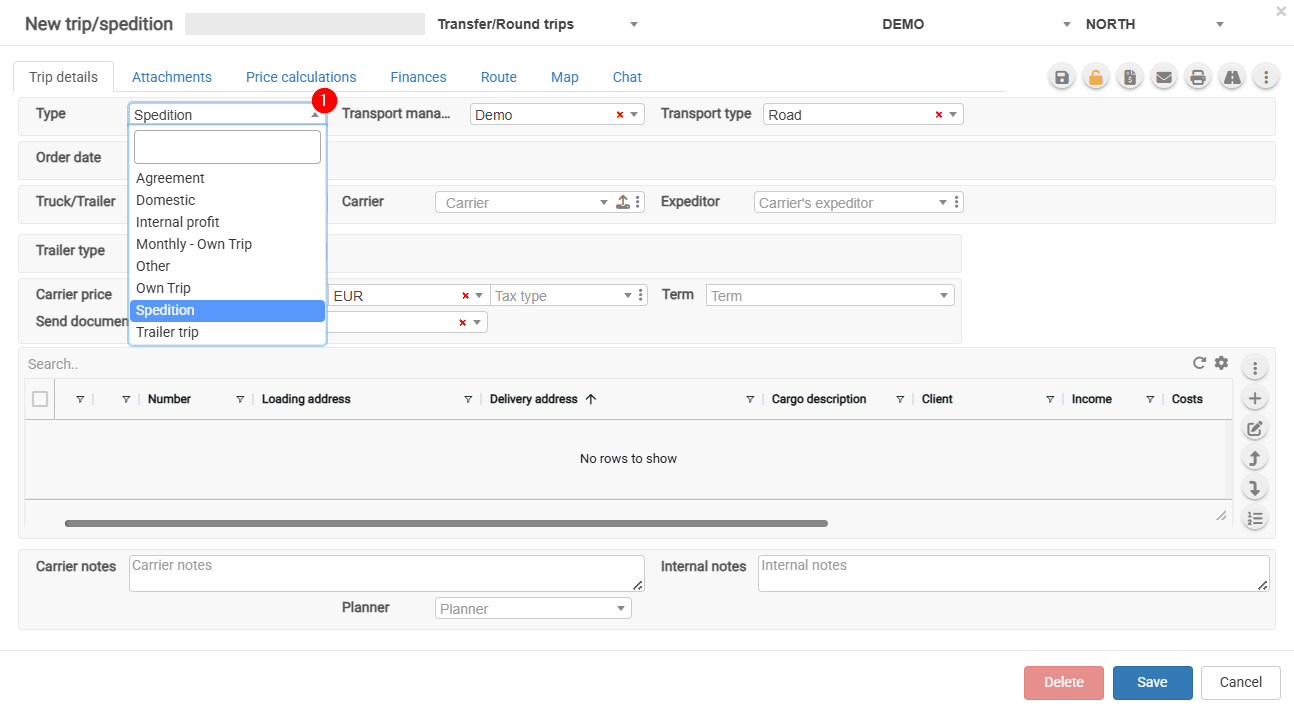
Which Trip/Expedition type should I choose?
- Agreement – Select this option when a subcontractor operates under your management and you are forwarding the vehicle for a full or partial route. Payment is usually calculated based on the kilometers driven.
- Domestic – Local transportation.
- Monthly – Monthly trip.
- Other – Other types of trips.
- Own Trip – Select this option when the trip is performed with your own vehicle. This enables the completion of the driver's report.
- Spedition – Freight forwarding and cargo transportation.
To ensure accurate trip reporting, it is important to select the correct trip type.
How to cauculate trip price
- Other expenses
- Idle time
- Extra LDM
- Loading locations
- Loading locations in Norway
- EU rate (EUR/km)
- Norway rate (EUR/km)
How to change the loading and delivery sequence in a trip?
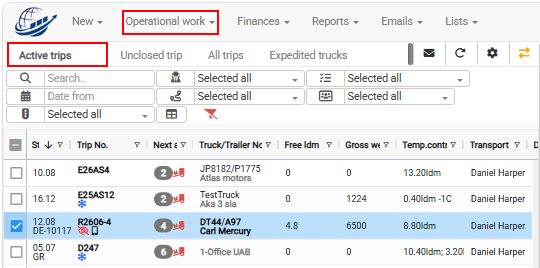
- Open Operational work → Trips/Speditions → Active trips.
- Select the required trip from the list on the left.

- Open the Map tab on the right side of the trip planning view.
- Drag and drop the loading or delivery points to change their sequence.
- Check the updated route information in the detail panel.
The route can be shown on the map only if the loading and delivery addresses have correct GPS coordinates.
If the route is not shown correctly, check the GPS coordinates for each loading and delivery address.
You can ask Cloudex TMS team to set GPS coordinates as a mandatory fields
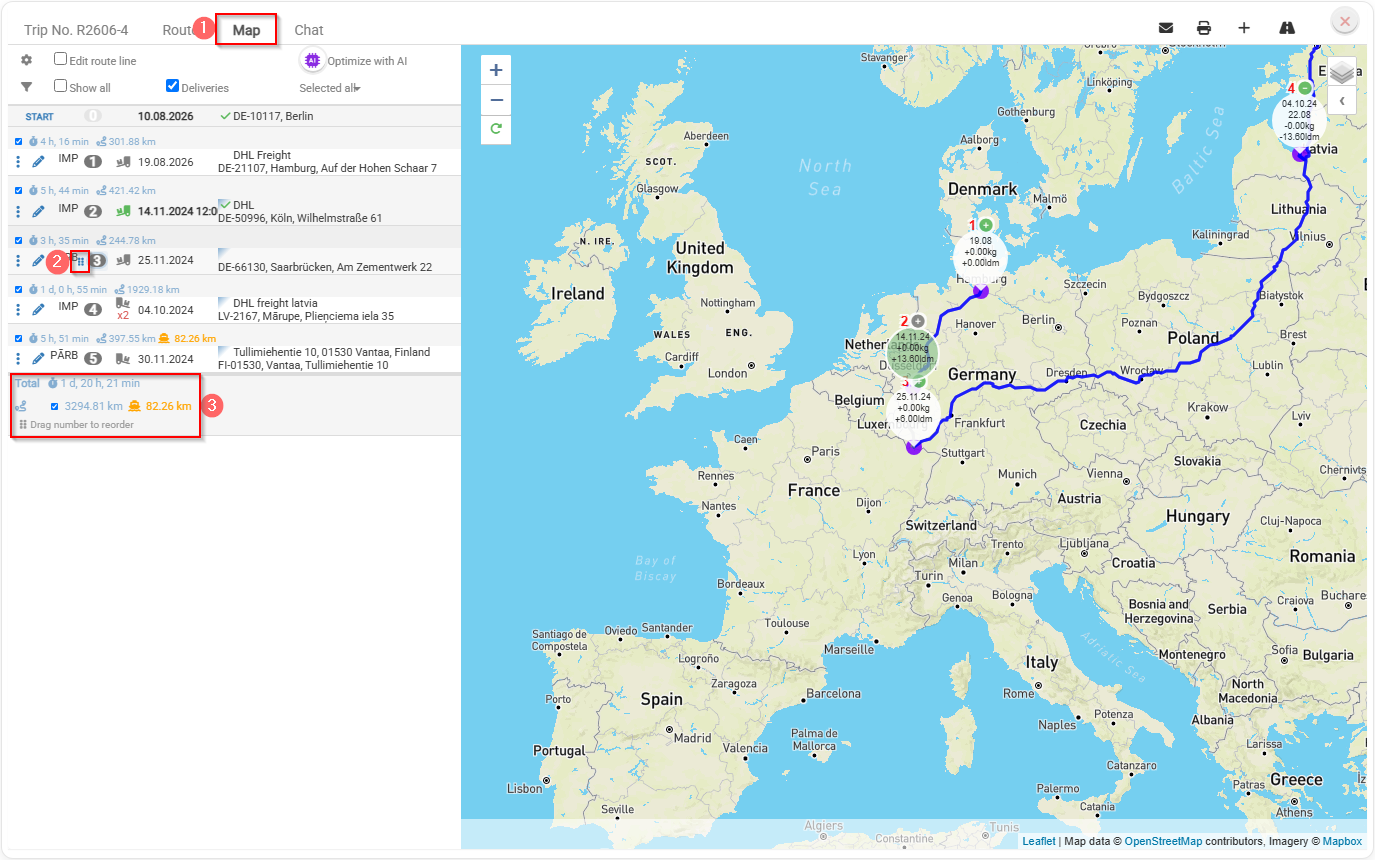
What can you check in the detail panel?
The detail panel shows:
- total travel time;
- total distance in kilometres;
- additional kilometres travelled by ferry.