Important! CLOUDEX TMS provides two options - automated and manual outgoing invoice.
Only one of options can be used for the accounting period!
#### 1. Payment of Outgoing invoices - automated data Import from the Bank 1.1. **Export Account report from your Bank** Open your company's **Internet Bank** > prepare **the Bank Account report** for the desired period > **Export it in ISO format.** > **Save this document to your computer.** 1.2. Open **CLOUDEX TMS** 1. **Finance > Incoming payments** 2. **Import payments from the Bank** (using symbol ["](https://doc.ozols.lv/uploads/images/gallery/2024-07/image-1719928964263.png)") [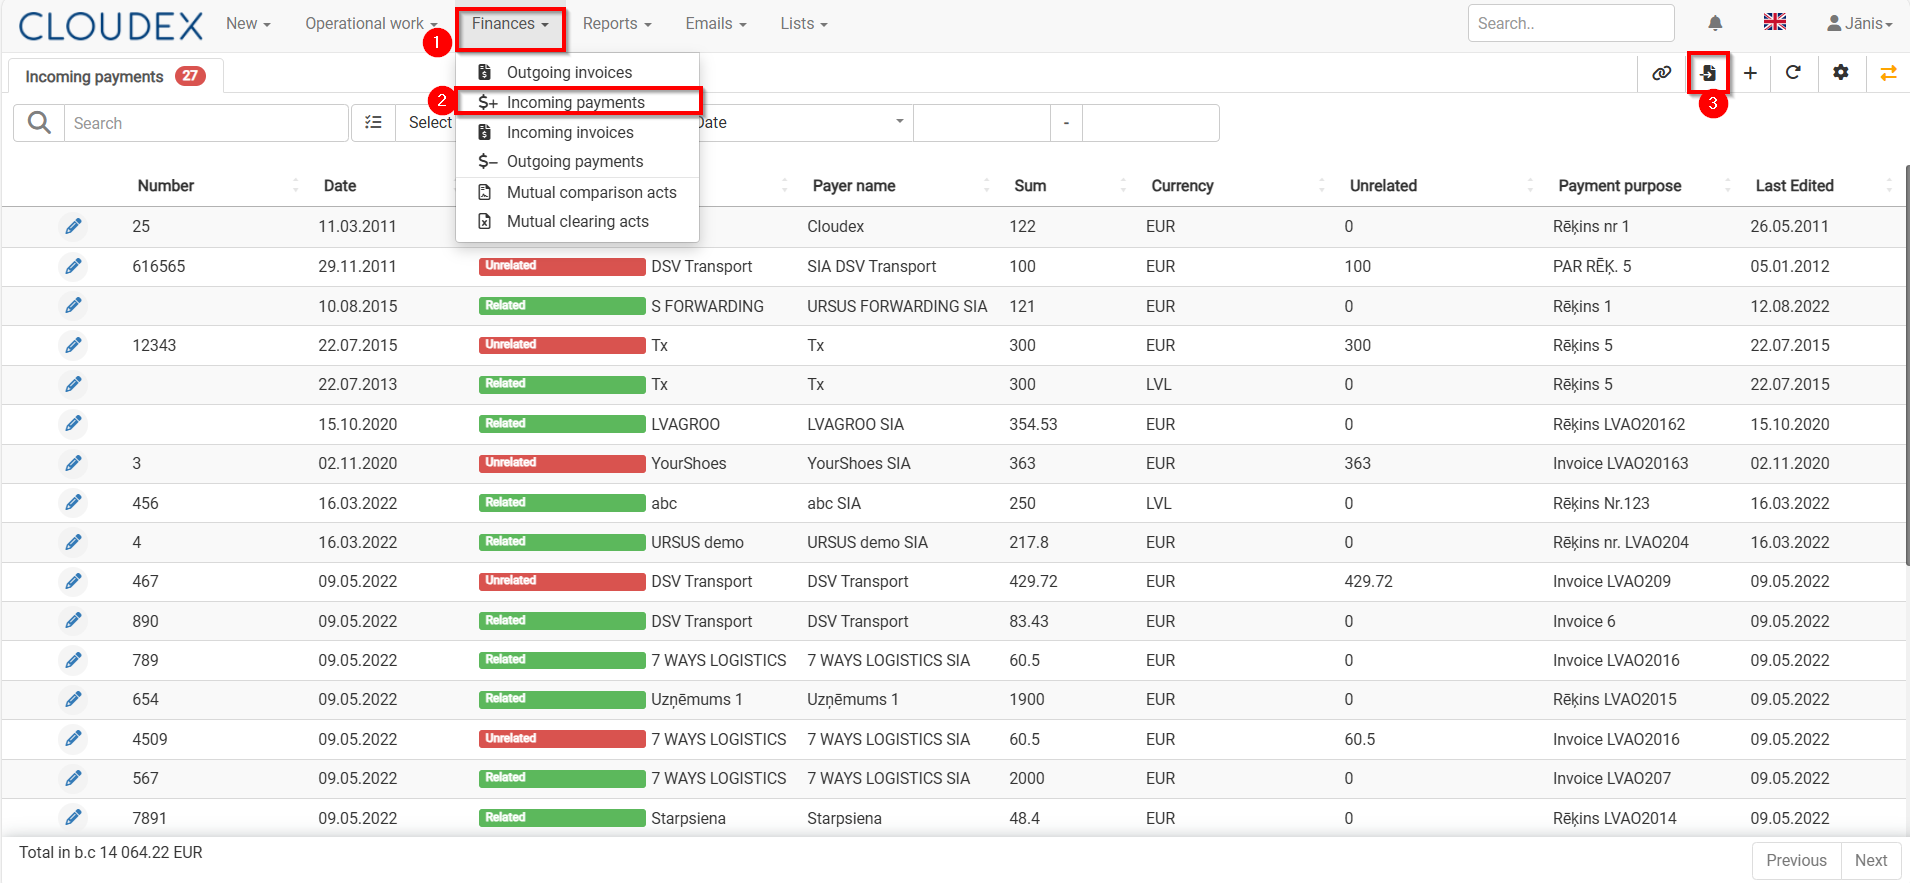](https://doc.ozols.lv/uploads/images/gallery/2024-07/import-from-bank.png)1.3. **Import** Bank payments 1\) Choose **the file** which you imported from **Internet Bank** 2) Press **Import [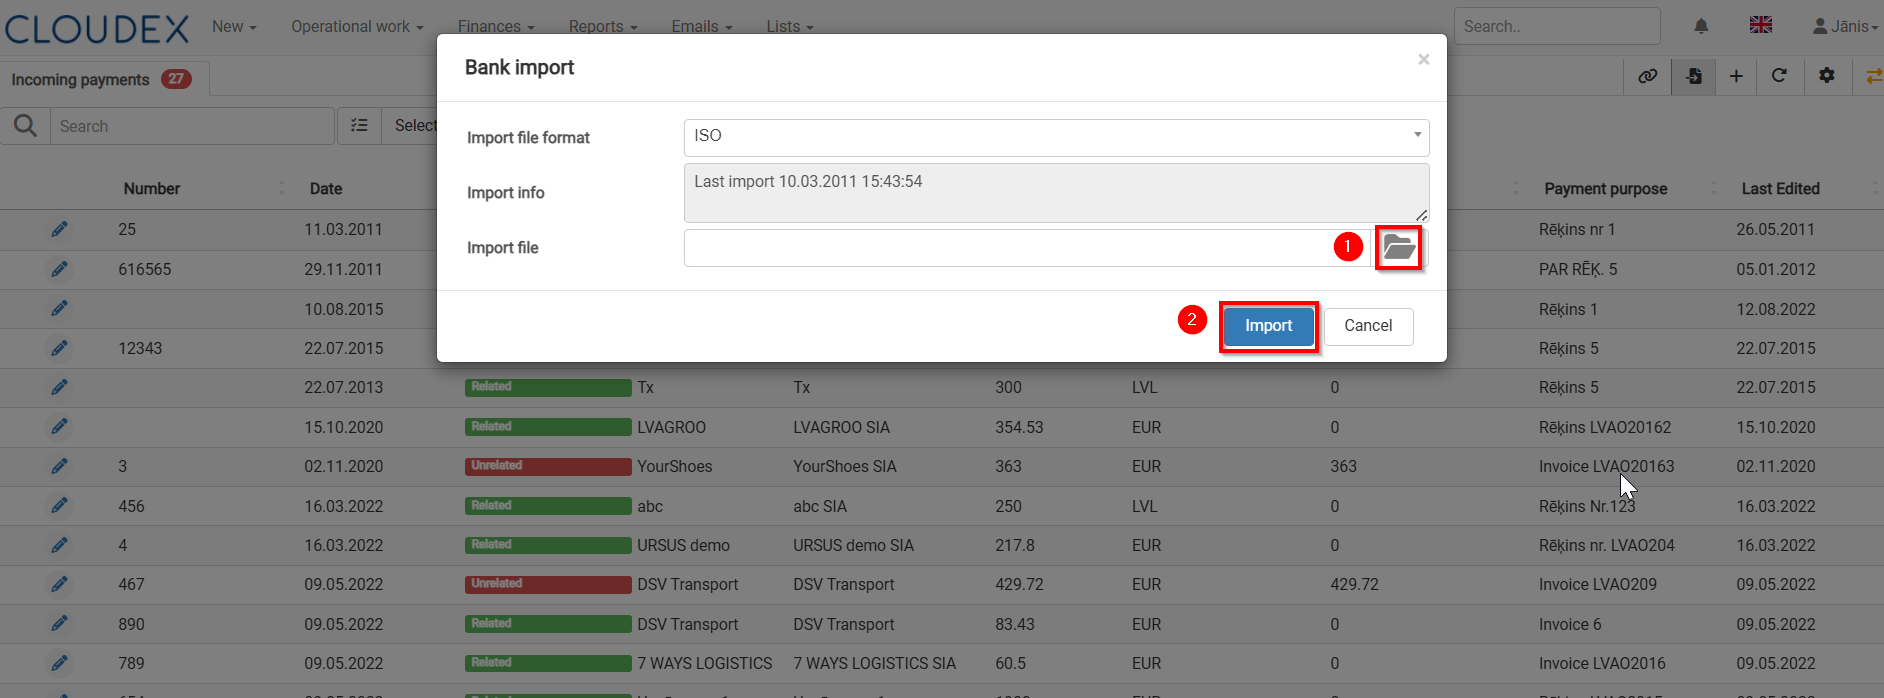](https://doc.ozols.lv/uploads/images/gallery/2024-07/import-the-fail.png)** #### 2. Linking "Incoming Bank payments" with "Outgoing invoices"When importing payments from the Internet bank, CLOUDEX TMS creates attachment of invoices, but if the invoices are not attached to the payment amount, then do the attachment according to the instructions bellow.
1\) **CLOUDEX TMS > Finaces >Incoming payments** 2) **Filter >**show only **Unrelated payments "Unrelated" (payments which are not related to invoices)** **[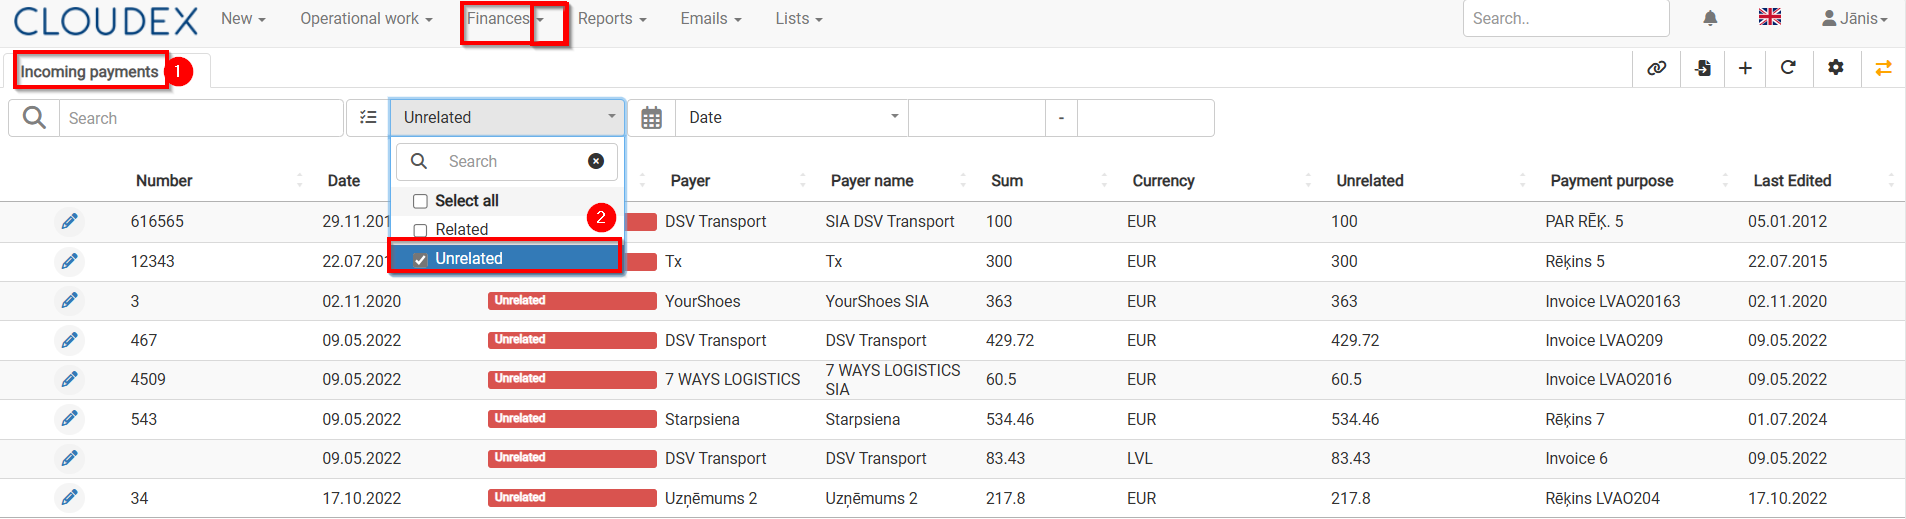](https://doc.ozols.lv/uploads/images/gallery/2024-07/puBunrelated-payments.png)** 3\) **Select** **Incoming Payment** which to "Relate" with Invoice 4\) Press the button "Relate invoices" [](https://doc.ozols.lv/uploads/images/gallery/2024-07/image-1719838166417.png) [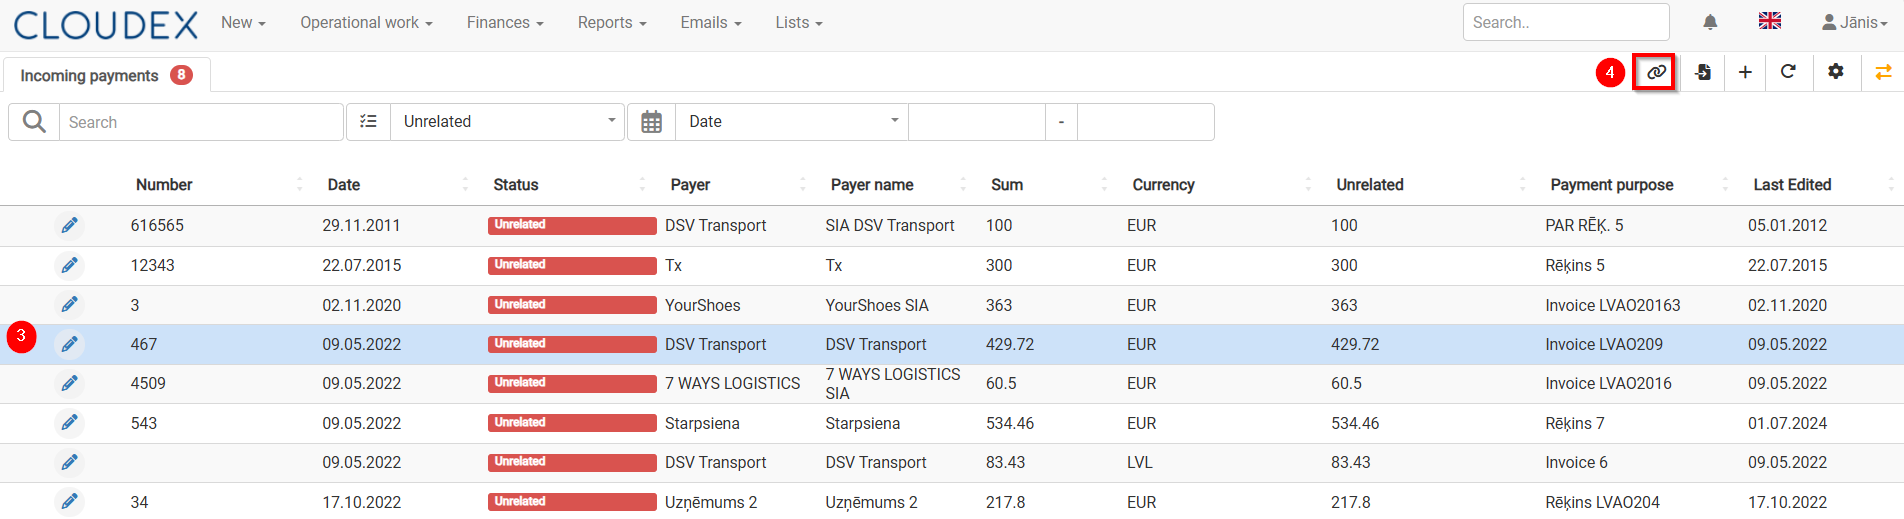](https://doc.ozols.lv/uploads/images/gallery/2024-07/relate.png) 5) In the list of Invoices, select the appropriate invoice/invoices for which payment has been made, mark them. 6) Selecting "the up arrow" you will be able to relate the invoice to payment. 7) Confirm with the button "Close". 8) With "the green arrows" it is possible to switch to another "Unlinked" payment. [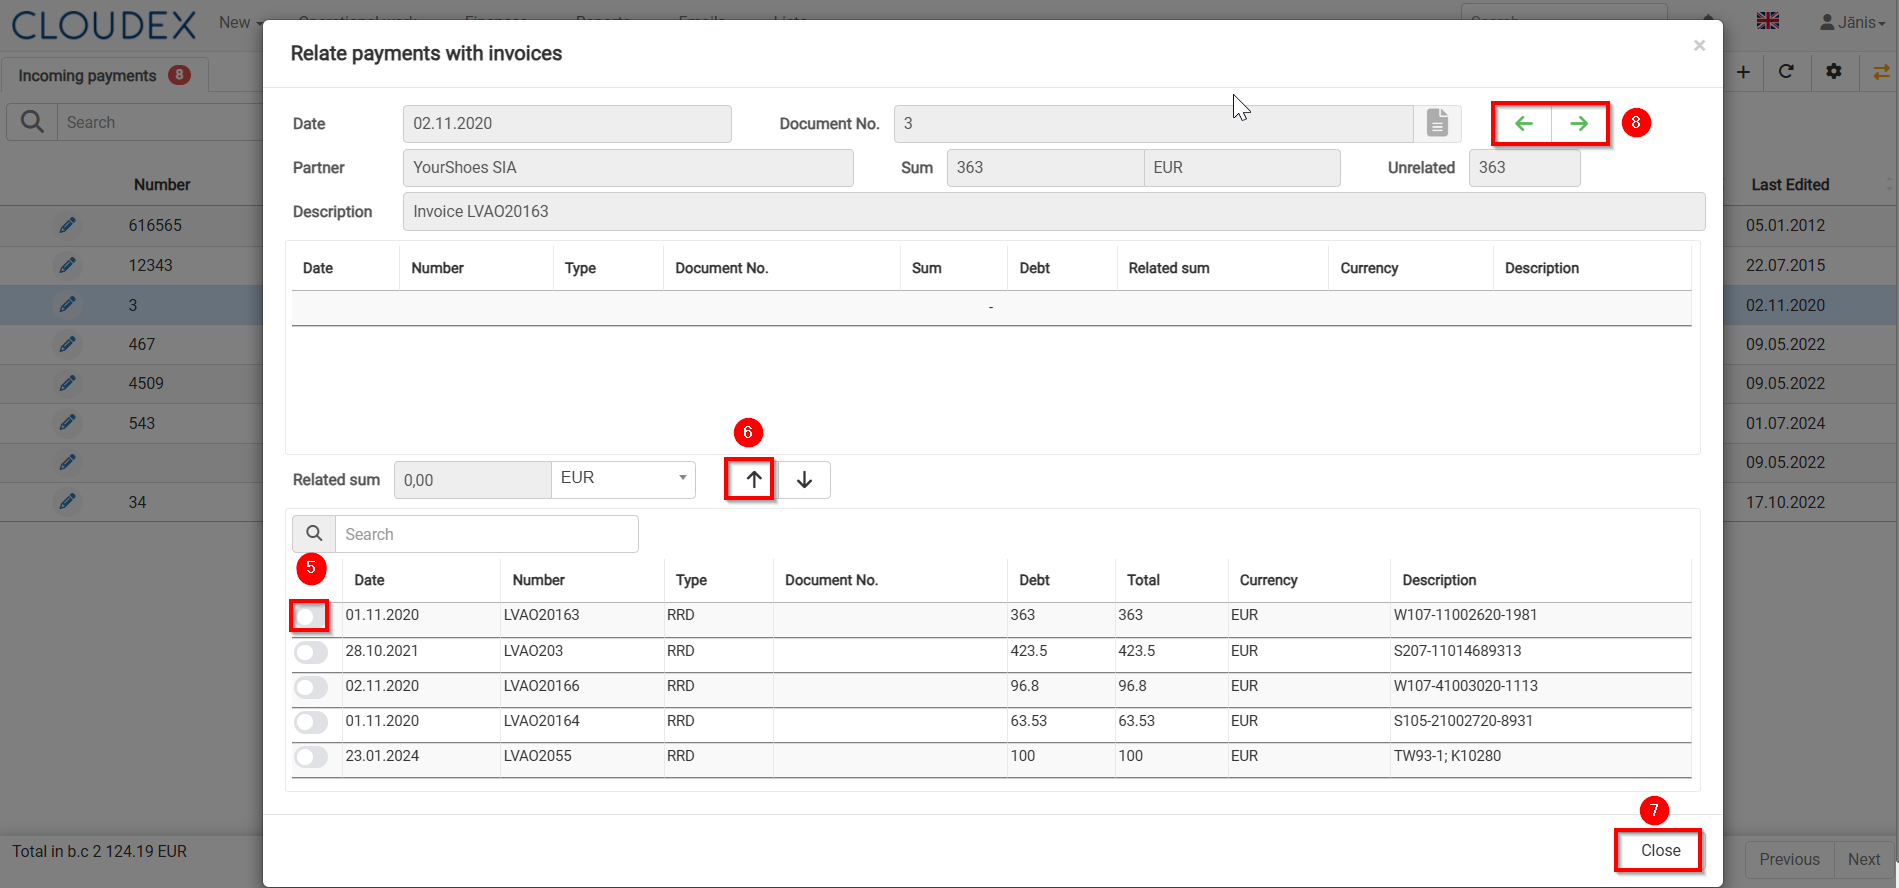](https://doc.ozols.lv/uploads/images/gallery/2024-07/relate-invoice-with-payment.png) 9) With the filter, you can quickly find the required invoice by number, amount, etc. [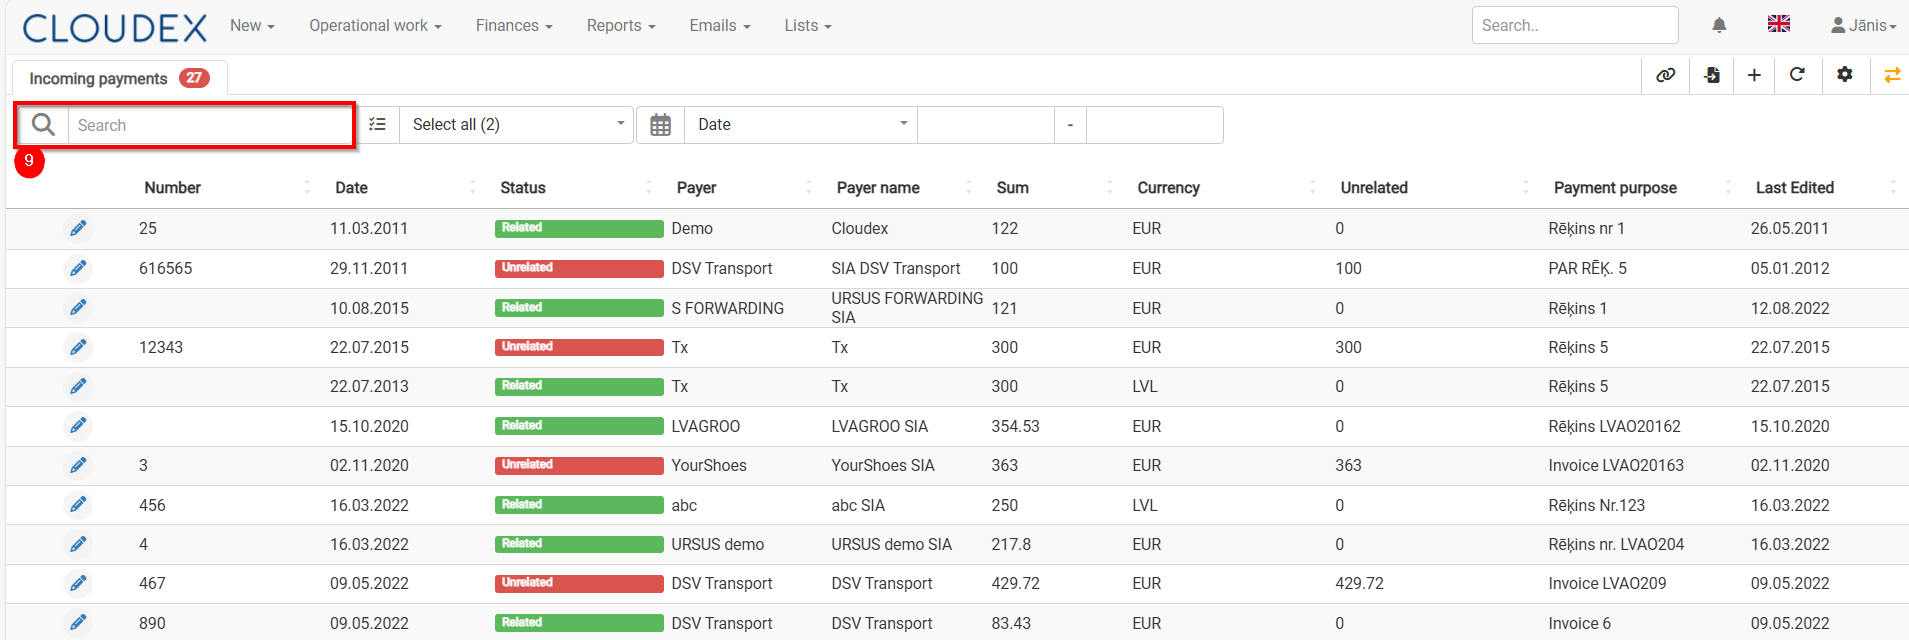](https://doc.ozols.lv/uploads/images/gallery/2024-07/filter.png)When the Incoming Payment is linked to the corresponding invoice, the amount in the "Unrelated" column in the Bank incomings list will be zero.
#### 3. Outgoing invoice payment - manual data entry 1. Go to **Finances >Outgoing Invoices** 2. Mark **Outgoing Invoices** which are **paid** 3. Choose function "Make Incoming payments for selected outgoing invoice" 4. Choose appropriate Bank account, if you have more than one account 5. Enter the Payment date. 6. Save [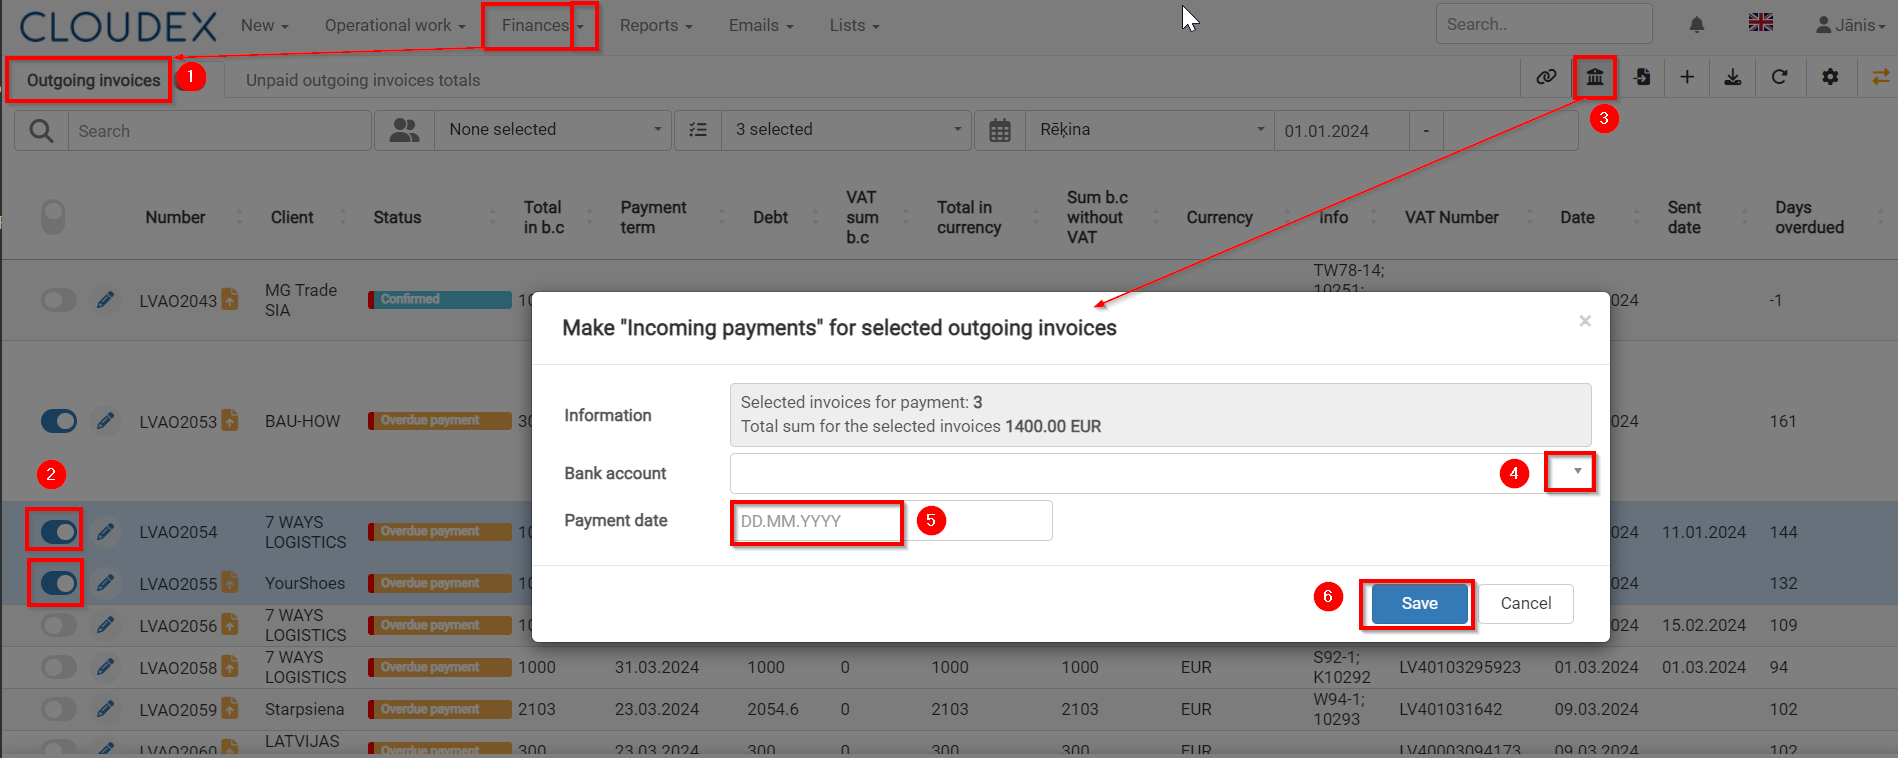](https://doc.ozols.lv/uploads/images/gallery/2024-07/manual-payment.png) #### 4. Tips and Tricks ##### 1 Trick. Add Bank account to payer in order to recognize Payer for next payments automaticaly 1. Choose **Payer** 2. Fill in the bank number. 3. Press **"Add Account to Payer Account."** [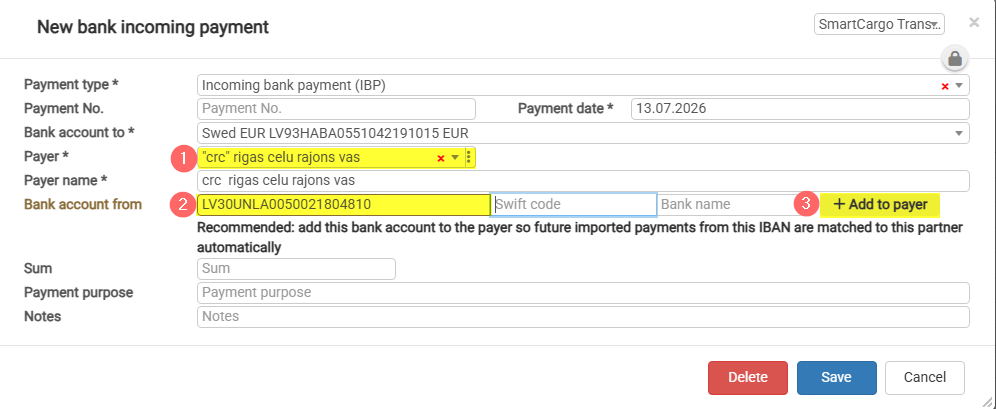](https://help.cloudex.app/uploads/images/gallery/2026-07/imwimage.png) ##### 2 Trick. How to unrelate payment from invoice [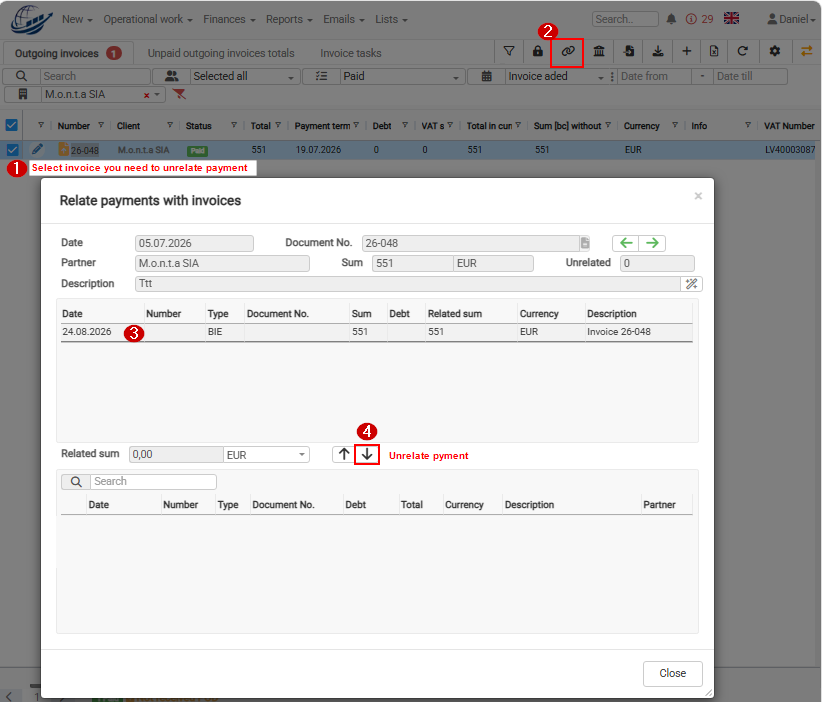](https://help.cloudex.app/uploads/images/gallery/2026-08/ftgimage.png)