How to review AI-generated Incoming invoices and POD/CMR documents?
Incoming invoices created automatically from emails processed by the Cloudex TMS AI mailbox must be reviewed before they are confirmed.
During the review, check:
When to use
Use this procedure when an Incoming invoice has been automatically created from an email received in your AI incoming-invoice-reading email.
All invoices created by AI generatedthat still require user validation can be found under:
Finances → Incoming invoices which are read from your AI incoming invoice email getting into→ Incoming invoices (in review)
How listto review an AI-generated Incoming invoice
1. Open the invoice
Go toto: Finances -→ Incoming invoices -→ Incoming invoices (in review)
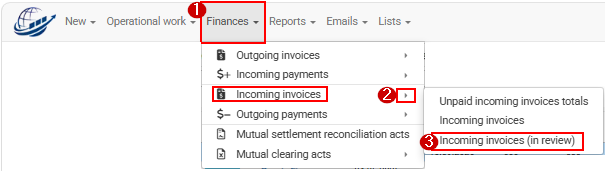
You will see all incomingIncoming invoices created by AI that still need to be reviewedreviewed.
Open the invoice you want to reviewreview.
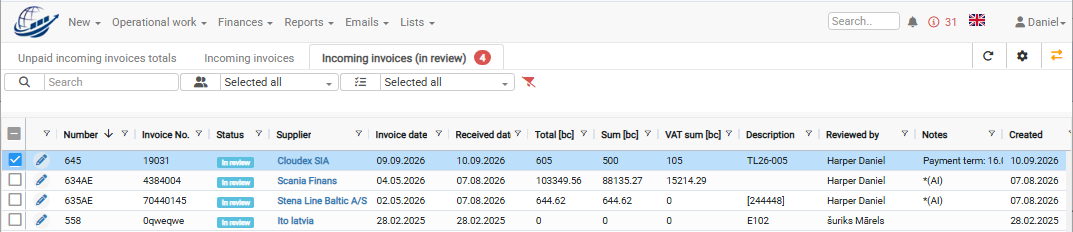
2. InOpen incomingthe invoice attachments
In the upper-right upper corner youof the Incoming invoice, click the Attachments icon.
The attachments received with the original email will findbe Attachmentsdisplayed.
Usually, whichthe willemail opencontains:
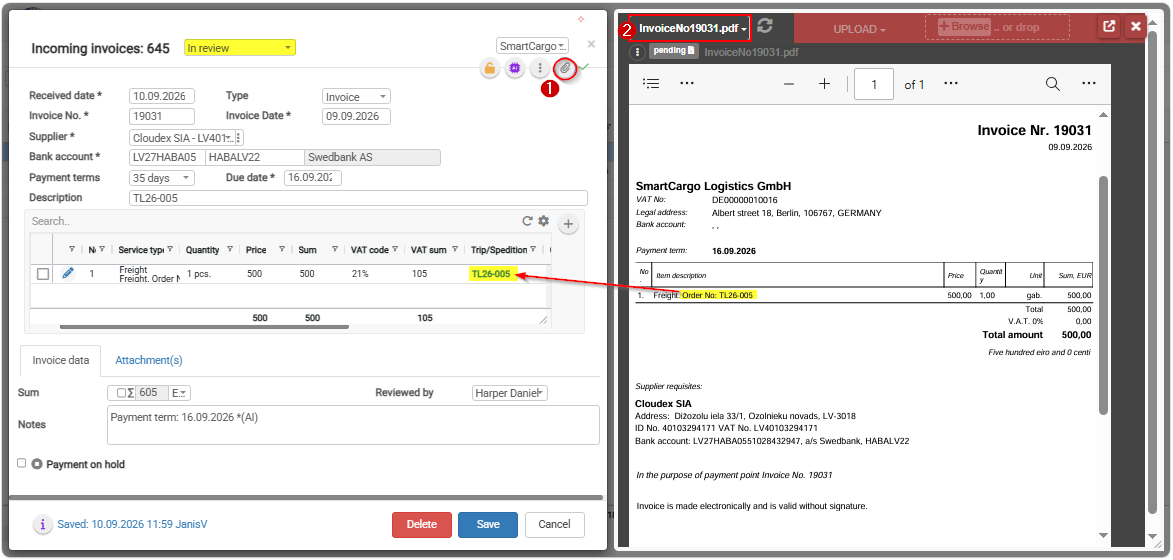
3. Compare the AI-generated invoice (usuallywith therethe needoriginal invoice
Select the original invoice attachment.
Cloudex TMS allows you to bereview the information side by side:
Check that the information read by AI is correct.
Pay particular attention to:
Correct any information if necessary.
Important: AI helps automate invoice data entry, but the user is responsible for reviewing the information before confirming the invoice.
Review POD/CMR attachments
After checking the invoice, review the POD/CMR documents received with the email.
The invoice PDF andshould shipment POD/CMR related to invoice.
Choose Invoice attachment so it is possible to see in left part of screen generated invoice and in right screen part original received invoice from your supplier.
pay attention that invoice isremain attached to the rightIncoming Trip/Spedition and sums are correctinvoice.
4. Check where the POD/CMR is attached
In the attachment list, check whether the POD/CMR file is shown under:
NextIncoming thinginvoice youor needClient order
If the POD/CMR is already attached to check do is to validate POD and move them tothe correct Client orderorder, ifno action is required.
If the POD/CMR is shown under Incoming invoice, Cloudex TMS or AI was not able to dodetermine it
Ifcorrect inClient Invoiceorder attachmentautomatically listand youthe seedocument that POD/CMR files are in Incoming invoice section it means they need tomust be moved manuallymanually.
This appropriatecan Clienthappen, orderfor example, when one carrier invoice contains costs for several shipments.
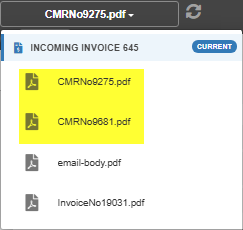
5. Move the POD/CMR to the correct Client order
PromFind 3the POD/CMR attachment.
Click the three-dot (...) menu choosenext Function:to the file and select: Move file to
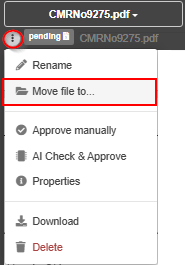
Select the appropriate Client order.
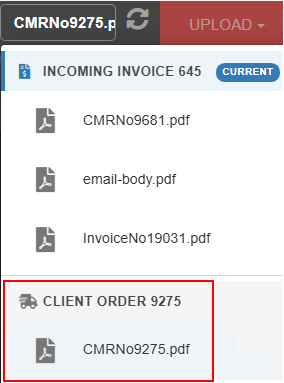
After moving the file, it will be displayed in the attachments list as a Client order attachment.
Important: Make sure you select the correct Client order before moving the document, especially when the Trip/Spedition contains several shipments.
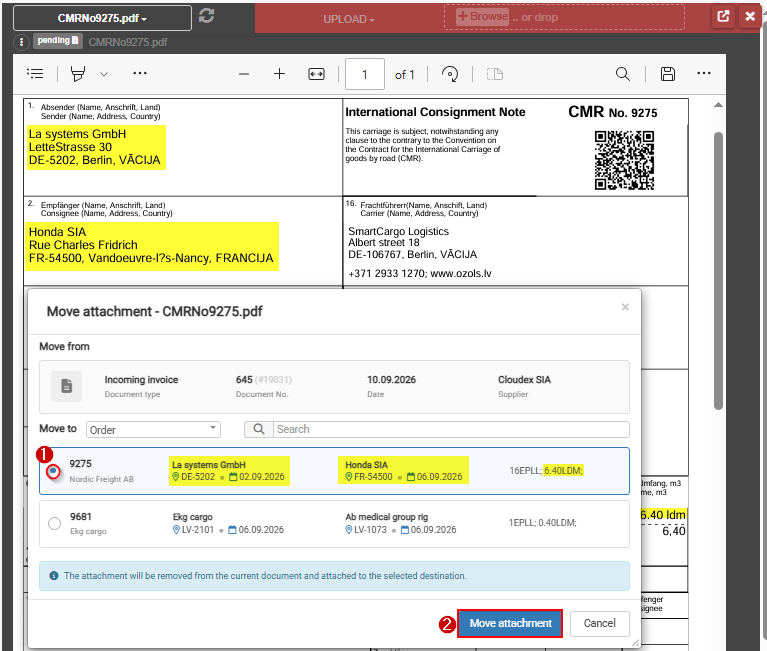
After you move POD/CMR to appropriate Client order in Invoice attachment list it will show as Client order attachment
6. Review and approve the POD/CMR
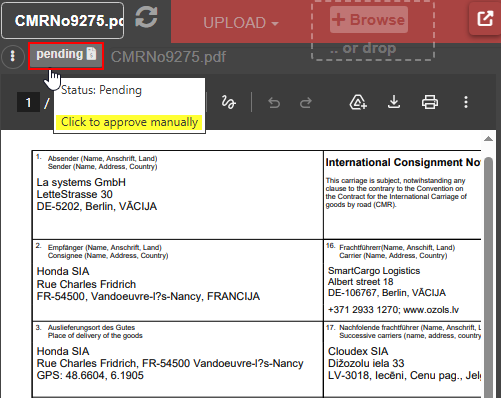
ClickOpen onthe POD/CMR filedocument and check that it belongs to approvethe it.selected SoClient thatorder.
Approve the POD/CMR if the document is correct.
An approved POD/CMR can then be used in the Client order invoicing process and, when automatic invoice sending is ready for invoicing and invoiceconfigured, can be sent automaticallyincluded with approvedthe POD/CMRoutgoing invoice.
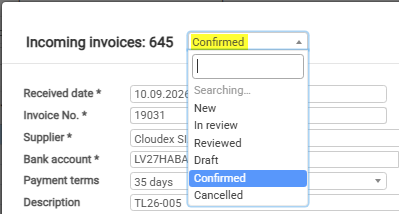
Confirm the Incoming invoice
FinallyAfter you have:
change the Incoming invoice status fromfrom:
In review to→ Confirmed
Click Save.
The AI-generated Incoming invoice has now been reviewed and Save the invoiceconfirmed.